Automatic Configuration: Integrated Fax
AdvancedMD’s PM & EHR applications utilize Integrated Fax to Manage information faster and more securely by converting your fax process to paperless. Combine multiple pages and file formats into a single outbound fax. Inbound pages are routed to folders in the practice management or chart folders within AdvancedMD EHR.
If you have the Integrated Fax printer already installed, remove it. To do this:
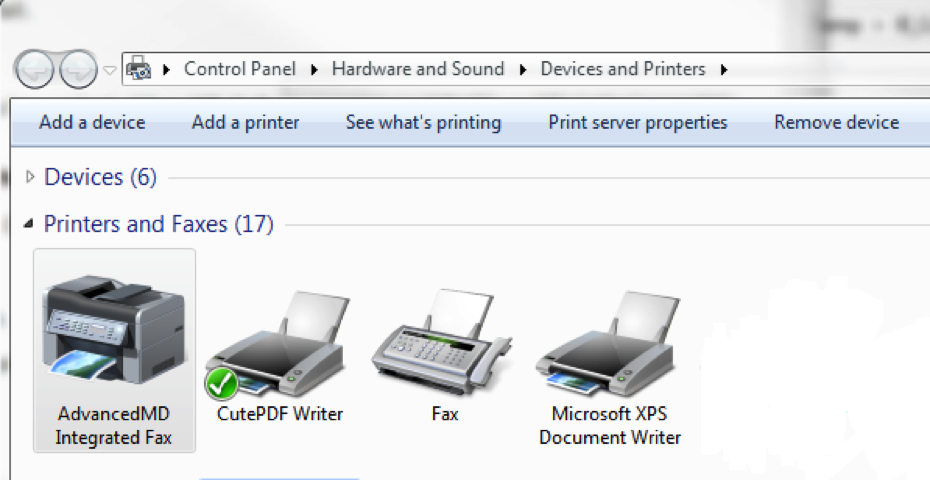
- Open your Start Menu and select Devices and Printers or search for Devices and Printers
- Select the Integrated Fax Printer then select Remove Device
Continue with the following steps to install the file.
- Click on the following link to download the Integrated Fax file. Save the file to your desktop or downloads folder, do not run it yet.
- Close all internet explorer windows, including any AdvancedMD windows that may be open.
- Open your Start Menu and select Devices and Printers or search for Devices and Printers
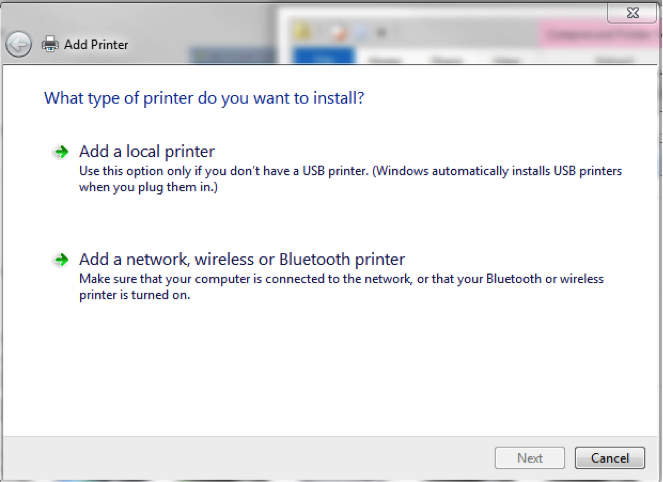
- Select Add a Printer

- Select Add a local printer

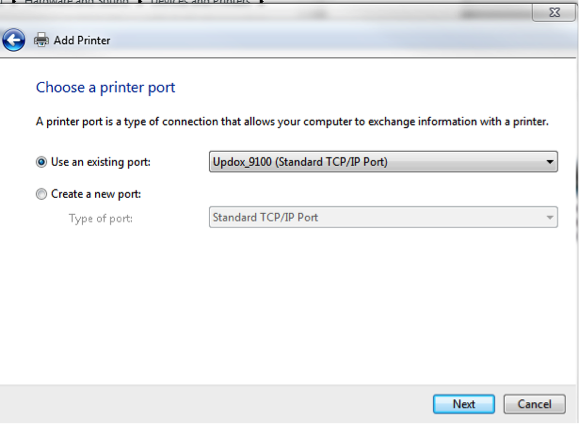
- Select Use an existing port and choose Updox_9100 (if this option does not exist, see below). Click Next

A) Select Create a new port and choose Standard TCP/IP Port. Click Next
B) Type Localhost for the Hostname or IP address, and Updox_9100 for the Port name.
C) If there is a Query the printer and automatically select the driver to use check box, clear it. Click Next.
D) Windows will then try to detect the printer, but will fail.
E) Click Custom. Click Next.
7. When you get to the window to Install the printer driver, select Windows Update
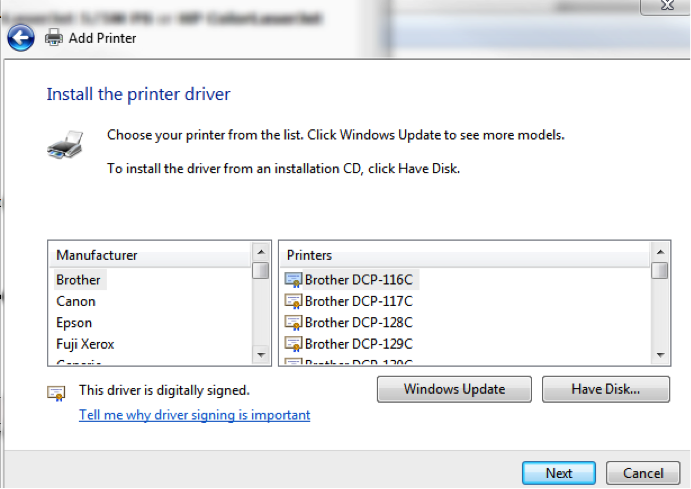
Once this is completed, select Cancel.
8. Once this is completed, select Cancel.
9. Run the Integrated Fax file. This will automatically set up the Integrated Fax printer.
Once the printer has been added to your system, you will need to do the following.
- Log into your key and open Integrated Fax.
- Open the Devices and Printer Window again. Right click the Integrated Fax printer (if it is not listed, press F5 to refresh the page) and set it as your default printer.
- Right click and select Printer Properties and select Print Test Page. Once the test page goes to Integrated Fax, you can set another printer as default.
AdvancedMD Feature Enhancements Series
AdvancedMD continually develops a large number of products and feature enhancements to help you automate your office workflow. This feature enhancement series explains each change in more detail so you can focus even more on your patients. For more in-depth information, schedule a free demo of AdvancedMD today.


